
Git Hub Instruction Site

Step 1.) Setting up Username/Email
Open up Git Bash program you just installed. The line with the $ is the current line where you type the commands. Type in the command as shown, and put YOUR information within Quotes:
1.]$ git config --global user.name “Type Your Name Here”
Then click enter.
Next we will set up email. Type the command:
2.]$ git config --global user.email "YourGitHubEmail@Domain.com"
Then click enter.
Note- The email address should be the same as the one you used to make your GitHub account. This email is saved with your commits. If you would like you E-mail to be hidden for whatever reason, click here ->.
Setting Up Your Newly Installed Git Bash
There are a couple of steps we have to complete, before we can start coding away:
-
Setting up a username, and email for Git Bash
-
Creating a repository.
-
Cloning repository to your Bash Client.
(Missed the installation? Click here to go back!)


Step 2.) Creating a Repository
Congratulations on your Progress!
We can now create a repository. A Repository is where you and others will work on your project together. It can be thought of as a folder that holds all the current code for your project.
(If a repository is already made, skip to step 3)
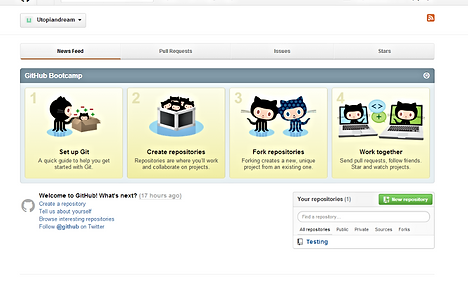
-First, go back to GitHub Website, and click the second icon “Create Repositories.” As shown in picture. (We will refer Repositories as repos, which is just a shorter word for the term.)
-Next Click the blue link, New Repository. You’ll be brought to a new page.
-Within the top text box under title Repository name, type in the name you want your Repo to be called. Example: "GitHub Test"
-Next you’ll see choices for public or private. Keep the default choice public, because private costs money, and you are still a beginner.
-Check the box for “Initialize this repo…” This will create a readme file for you, which is a About Me Text file for the program you are writing.
-Under this are 2 Drop down boxes for .gitignore and adding a license. Keep these at None for now.
For those who are curious, the .gitignore is used for certain code, depending on what your coding, ie C++, that is used to help prevent problems with .config files, seeing as these can be different from other peoples .config files. GitHub will ignore these files depending on which language you choose, and will help prevent future issues with commits.
To finish, Click Create Repository.
Step 3.) Adding Repo to Bash Client
Congratulations!! You now have a project Repo.
Before you minimize the website, and get back to the good ole programming, we have to copy the URL in order to clone your repo.
--->What does this mean? This is how we get the files from your Repo to the Bash client.
- Highlight and copy the URL, or just click the clipboard icon to copy it to your clip board.
-Open the Bash program back up. We want to make sure everyone is on the same page, so were going to change directory = “cd”, to your desktop.
Type in:
1.] $ cd desktop
!Quick Tip! (Command: “ls” will show you the contents of the current folder you are in, this is basic knowledge for a computer programmer, so get use to using this and "cd")
-Now to clone your repo Type in:
2.]$ git clone "Paste your URL Here"
(Right click the top header bar for bash program, then go to Edit, then paste as shown in picture.)
-Hit Enter. There should be a new folder on your Desktop with the name of the repository you created.
-Now we are going to go into that folder with bash. Type on command line:
3.]$ cd “Name of your Folder”
You should now see (master) above command line. We won’t go into further details about this, just think about it as being at the trunk of a tree that will branch out.


